Most of us learn how to ride a bike from our parents at an early age, and the education pretty much ends there. When we hit the trail on a mountain bike for the first time, often many years later, we put our faith that same basic education and hope our natural skill rises to the occasion. You either got it or you don’t, right?
Wrong.
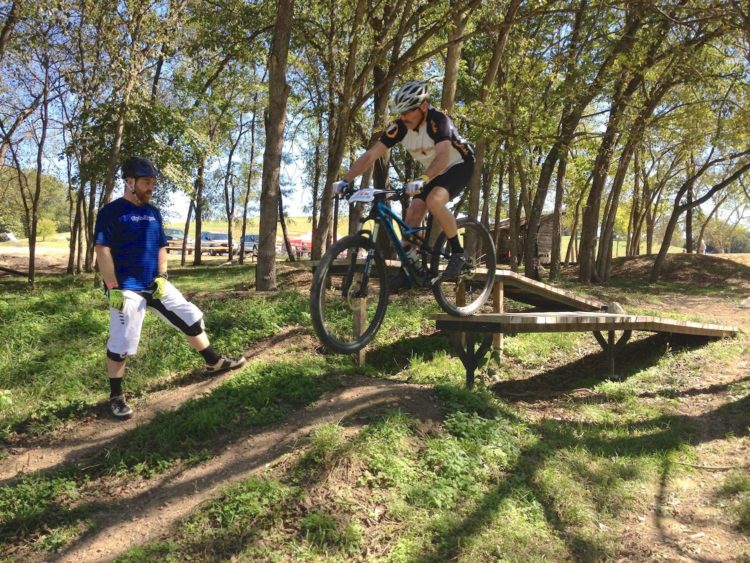
A recent clinic I attended with St. Louis-based Roots Mountain Biking proved that a little expert coaching goes a long way. (I can see improvement already, even as I still “field-test” my new skills.) Here are a few of the things I learned during the Level 1 and Level 2 courses I took with Roots founder and International Mountain Bicycling Association (IMBA) certified instructor Jay Thomas.
Clipless pedals don’t make you better. Sure, they make you feel more “attached” to the bike, and they can help with efficiency, but that doesn’t mean they actually enhance your skills. In fact, they can hinder development of proper technique when it comes to body positioning and wheel lifts. “You shouldn’t be jumping and pulling the bike up with your legs,” said Thomas.
The proper front wheel lift technique is to crouch down and slightly forward to the handlebar, elbows bent and pointing out. This “loads” your body. To execute the lift, push off the handlebar while moving your shoulders up and back. At the same time, drive down on the pedals. Your body’s rearward momentum combined with your feet pushing the pedals should lift the front wheel.
You need to stand up more. “People in the Midwest tend sit a lot when they ride,” said Thomas, who grew up riding in the Northeast. Standing up allows you to drop easier into the “attack position” (crouched and leaned slightly forward) to improve control of the bike. It also keeps your feet “heavy” on the pedals for better balance and absorption when you hit bumps on the trail.
Another benefit of standing is that it encourages you to look farther ahead and not at your front wheel. “Wherever you look is where your bike is going to go,” said Thomas. The trick is to disregard the roots and rocks and concentrate on the path you want to take. Save sitting for flatter trail sections, where you can pedal and recover for your next obstacle.
Braking can do more harm that good. It’s natural to want to grab a handful of brake when you’re in a dicey situation, but locking up can cause a skid and put you on the ground in a hurry. Remember that you don’t have control of the bike unless the wheels are free to turn.
As mentioned above, looking down the trail is important. This gives you time to spot hazards and slow down without panicking. Apply your brakes — both brakes, front and rear — smoothly and keep your weight low and centered. Dropping your heels and pushing the pedals forward and away will help keep you in a neutral position while decreasing your bike’s forward momentum.
Regarding corners: Make sure you brake before you are in them. This will maximize traction and control in the turn itself. Plus, you’ll be able to concentrate on your cornering technique; ride with a good, balanced position over the bike (lean the bike, not your body) and keep your eyes on the exit of the turn (where you want to bike to go) rather than on your front wheel.
Don’t lean too far back on descents or drops. A lot of us have been told we should shift our weight way back in descents or during drops so we don’t go over the handlebars. This is not good advice. By leaning back and hanging our butt off the saddle, we end up extending our arms and removing our weight from the front wheel, which means we no longer have control of our steering.
The proper technique, once again, is to keep your body low and centered, with your weight on the pedals. When standing — by the way, you should be standing — the bike will pivot forward under you, giving the impression that your weight has shifted back, but in reality you are balanced and ready to absorb any impacts without pitching forward or hanging onto your handlebars while the bike goes where it wants.
While it may seem counterintuitive, going faster when riding downhill or hitting a drop can be easier than going slower. That’s because the faster your wheels spin, the more they want to stay upright. On the other hand, a slower-spinning wheel is easier to tip over.
Of course, you should always ride in control. But, trust me, after a session or two with Roots Mountain Biking your speed and control of the bike — and your confidence on the trail — will increase significantly. Find more information at rootsmountainbiking.com.
On the Level
Here’s some of what you can expect to cover in each progressive session with Roots Mountain Biking:
Level 1
Body positioning
Braking
Front wheel lifts
Intro to cornering
Level 2
Cornering
Rear wheel lifts
Level lifts
Intro to drops
Level 3
Drops
Advanced cornering
Bunny hops
Negotiating obstacles
Author: Brad Kovach is the editor of Terrain magazine


Great article. Ironic I was just watching Roots mountain bike on YouTube. I definitely want to get to one of their clinics. I do live in southeast Michigan however, and it would be really cool if they were something a little closer. If you have any information about possible clinics closer to my place that would be awesome. Peace ✌️